Store-bought treats are convenient, but they often come loaded with preservatives, artificial flavors, and questionable ingredients. Who wants that for their furry best friend? By learning how to make vet-approved dog treats at home, you can spoil your pup with delicious and nutritious snacks that are good for them too!
Why Make Vet-Approved Dog Treats at Home?
There are numerous benefits to ditching the store-bought options and making vet-approved dog treats at home:
- Know Exactly What Goes In: You control the ingredients, ensuring your pup gets only the good stuff – no mystery meats or fillers!
- Customize for Allergies and Sensitivities: Does your dog have a sensitive tummy? No problem! You can tailor recipes to avoid ingredients that trigger allergies.
- Packed with Nutrition: Fresh and wholesome ingredients provide essential vitamins, minerals, and fiber to support your dog’s overall health and well-being.
- Bonding Experience: Baking with your dog is a fun way to show them you care. Plus, the yummy smells are sure to get their tails wagging with anticipation!
Before You Get Baking
While these recipes are perfectly pup-safe, it’s always a good idea to consult with your veterinarian before introducing new foods to your dog’s diet. This is especially important for dogs with allergies, weight concerns, or any underlying health conditions.
Here are some general tips for making vet-approved dog treats at home:
- Use high-quality ingredients that you would feel comfortable eating yourself.
- Avoid ingredients that are toxic to dogs, such as chocolate, grapes, raisins, onions, and macadamia nuts.
- Adjust portion sizes based on your dog’s breed, size, and activity level.
- Store leftover treats in an airtight container in the refrigerator for up to a week or freeze for longer storage.
Essential Kitchen Tools for Making Dog Treats
You don’t need a fancy kitchen setup to make vet-approved dog treats at home. Here are some basic tools that will come in handy:
- Mixing bowls
- Rolling pin
- Baking sheets
- Parchment paper
- Cookie cutters (optional)
- Measuring cups and spoons
7 Pawsome Recipes for Making Vet-Approved Dog Treats
Now, let’s get baking! Here are seven delicious and vet-approved dog treat recipes that are sure to leave your pup barking for more:
1. Sweet Potato and Pumpkin Powerhouse
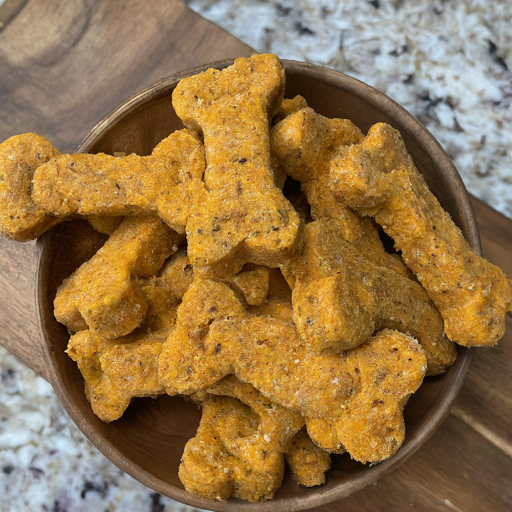
Sweet potatoes and pumpkin are packed with vitamins, fiber, and beta-carotene – all excellent for your dog’s health. This recipe is a winner for both taste and nutrition.
Ingredients:
- 1 cup mashed sweet potato
- 1/2 cup canned pumpkin puree (not pie filling)
- 1 1/2 cups whole wheat flour
- 1/4 cup rolled oats
- 1/4 cup unsweetened applesauce
Instructions:
- Preheat oven to 350°F (175°C). Line a baking sheet with parchment paper.
- In a large bowl, combine mashed sweet potato, pumpkin puree, applesauce, and rolled oats. Mix well.
- Gradually add flour until a soft dough forms.
- Roll out dough on a lightly floured surface to about 1/4-inch thickness.
- Use cookie cutters to cut out desired shapes.
- Place treats on prepared baking sheet and bake for 15-20 minutes, or until golden brown.
- Let cool completely before serving to your dog.
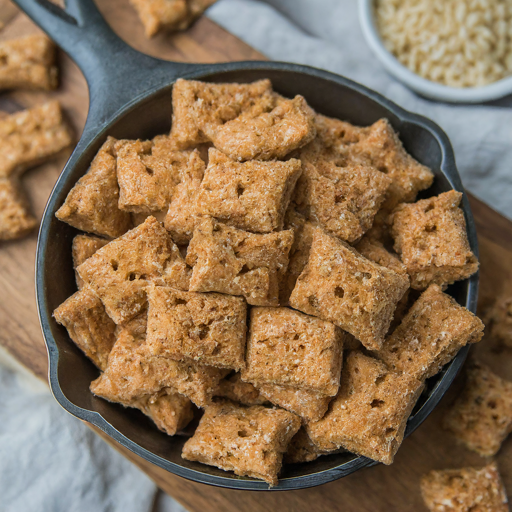
2. Cheesy Apple Crunch
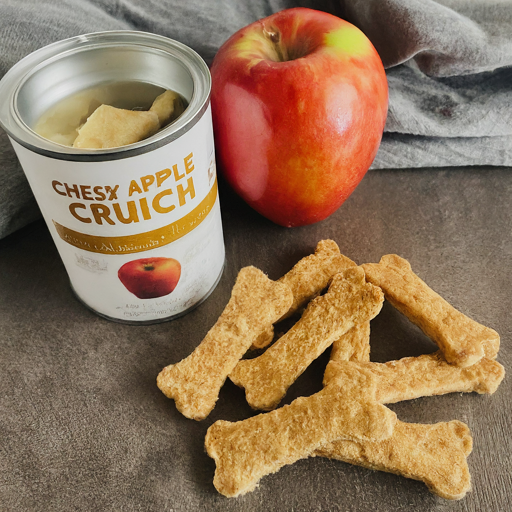
This recipe combines the goodness of apples (a great source of fiber and vitamins) with a touch of cheddar cheese for a satisfying crunch.
Ingredients:
- 1 cup grated cheddar cheese
- 1 cup rolled oats
- 1/2 cup unsweetened applesauce
- 1/4 cup whole wheat flour
Instructions:
- Preheat oven to 350°F (175°C). Line a baking sheet with parchment paper.
- In a large bowl, combine all ingredients and mix well.
- Press dough evenly onto prepared baking sheet.
- Score the dough lightly with a knife to create bite-sized pieces.
- Bake for 20-25 minutes, or until edges are golden brown.
- Let cool completely before serving to your dog.
3. Banana Oatmeal Bonanza

This recipe is a fantastic source of fiber and potassium, thanks to the bananas and oats. It’s also a great way to use up ripe bananas!
Ingredients:
- 1 cup mashed ripe banana
- 1 1/2 cups rolled oats
- 1/4 cup unsweetened applesauce
- 1/4 cup plain yogurt (unsweetened)
Instructions:
- Preheat oven to 350°F (175°C). Line a baking sheet with parchment paper.
- In a large bowl, combine mashed banana, rolled oats, applesauce, and yogurt. Mix well.
- Drop tablespoons of dough onto prepared baking sheet.
- Bake for 15-20 minutes, or until edges are golden brown.
- Let cool completely before serving to your dog.
4. Dehydrated Sweet Potato Chews

These chewy treats are a healthy alternative to store-bought jerky treats and are perfect for satisfying your dog’s natural chewing instincts.
Ingredients:
- 2 large sweet potatoes
Instructions:
- Preheat oven to its lowest setting (around 200°F or 93°C). Line baking sheets with parchment paper.
- Wash and thinly slice sweet potatoes (around 1/4-inch thickness).
- Arrange sweet potato slices in a single layer on prepared baking sheets.
- Bake for 3-4 hours, or until slices are completely dehydrated and crisp. They should bend easily but not break.
- Let cool completely before serving to your dog.
5. Pupsicles for Hot Days

These refreshing pupsicles are a fun and healthy way to keep your dog cool on a hot day.
Ingredients:
- 1 cup plain yogurt (unsweetened)
- 1/2 cup mashed banana
- 1/2 cup chicken broth (low-sodium)
Instructions:
- In a blender, combine yogurt, mashed banana, and chicken broth. Blend until smooth.
- Pour mixture into ice cube trays or small silicone molds.
- Freeze for at least 4 hours, or until solid.
- Let pup enjoy this icy treat on a hot day!
6. Salmon and Brown Rice Bites
Salmon is a great source of omega-3 fatty acids, which are beneficial for your dog’s skin and coat health. This recipe combines salmon with brown rice for a nutritious and delicious treat.
Ingredients:
- 1 cup cooked brown rice
- 1 cup cooked salmon (flaked and skinless)
- 1/2 cup mashed sweet potato
- 1/4 cup whole wheat flour (or coconut flour for grain-free option)
Instructions:
- Preheat oven to 350°F (175°C). Line a baking sheet with parchment paper.
- In a large bowl, combine cooked brown rice, flaked salmon, mashed sweet potato, and flour. Mix well.
- Roll dough into small balls.
- Place balls on prepared baking sheet and bake for 15-20 minutes, or until golden brown.
- Let cool completely before serving to your dog.
7. Peanut Butter and Banana Blitz

This recipe is a classic combination that most dogs love! Be sure to use xylitol-free peanut butter as xylitol is toxic to dogs.
Ingredients:
- 1 cup whole wheat flour
- 1/2 cup rolled oats
- 1/2 cup mashed ripe banana
- 1/3 cup creamy peanut butter (xylitol-free)
- 1/4 cup water
Instructions:
- Preheat oven to 350°F (175°C). Line a baking sheet with parchment paper.
- In a large bowl, combine flour, rolled oats, mashed banana, and peanut butter. Mix well.
- Gradually add water until a soft dough forms.
- Roll out dough on a lightly floured surface to about 1/4-inch thickness.
- Use cookie cutters to cut out desired shapes.
- Place treats on prepared baking sheet and bake for 15-20 minutes, or until golden brown.
- Let cool completely before serving to your dog.
How to Make Vet-Approved Dog Treats at Home: Unleash Your Inner Baker for a Happy Pup (continued)
Get Creative and Customize!
The beauty of making vet-approved dog treats at home is the endless possibilities for customization. Here are some ideas to get you started:
- Swap flours: Experiment with different flouts like oat flour, coconut flour, or almond flour (depending on your dog’s allergies) to create a variety of textures.
- Add a veggie boost: Finely grated carrots, zucchini, or sweet potato add a touch of sweetness and extra nutrients.
- Spice it up (a little): A pinch of cinnamon or ginger can add a subtle flavor that some pups enjoy (be sure to check with your vet first).
- Get fruity: Fresh or dried blueberries, cranberries, or chopped apples (minus the core) can be a delicious addition to certain recipes (again, consult your vet regarding suitability for your dog).
- Frosty Fun: For a refreshing summer treat, freeze leftover biscuit dough in silicone molds for homemade pup-sicles!
Remember:
- Always introduce new foods gradually to avoid stomach upset.
- Start with small portions and monitor your dog for any allergic reactions.
- Store leftover treats in an airtight container in the refrigerator for up to a week or freeze for longer storage.
Conclusion
By following these tips and recipes, you can easily make vet-approved dog treats at home that are both delicious and nutritious for your furry friend. So, preheat your oven, grab your ingredients, and get ready to create some pawsome memories with your pup in the kitchen!
Remember, you can also find a variety of delicious and healthy treats at Truffle Paws, so be sure to check out our selection for your furry friend!
Bonus Tip: Get the whole family involved in the baking fun! It’s a great way to bond with your dog and teach kids about pet care and healthy eating habits.
Now go forth and bake some happiness for your pup! And don’t forget to explore the Truffle Paws collection for even more tail-wagging treats!